I am crazy excited for you to read this post by guest writer Kristen. She did a fantastic job putting together a flawless makeup look that will be perfect for your vacation photos and stay on all day in the Parks! She has excellent product recommendations and application tips and she keeps your budget in mind. Enjoy! -Nicole
Let’s face it; if you are a makeup wearer like myself, it is very difficult to find products and techniques that meet all the challenges that a day at the theme parks throws at you. I have had a lot of trial-and-error experiences, but I think I’ve finally nailed a look that will beat the hottest, longest Florida summer days.
This look is my go-to for a day at Walt Disney World or Universal Orlando. It looks great in photos, stands up well to the heat and the sun, and is really quite easy to achieve. That’s not even the best part! Most of these products can be found at the drugstore, so they won’t break the bank.
Sorry about the lighting changes here and there throughout. I was using natural lighting so as to show everything true to color, and daylight was very in and out. And then it got dark outside.
Now that you know the lowdown, let’s get started!
On days when I know I want my makeup to last for hours and hours, a primer is essential. My skin is more on the oily side, so I usually reach for the NYX Angel Veil primer. This is a great dupe for the Hourglass Mineral Veil Primer, and it’s about one-third of the cost. It’s silicone-based, so it will really smooth over any fine lines and marks. It’s also oil-free, so it will give you a smooth finish that will look great in pictures! For dry skin, the Stila stay-all-day HD Illuminating Balm gives you a primer and a glowing complexion, and it also has SPF 30! I reach for this a lot in the winter months.

Once your face is primed, we can move on to foundation. For my oily skin, I have fallen in love with the Rimmel “Stay Matte” foundation. It has a mousse-y texture that is SO easy to blend, and it keeps me matte all day! I wore this foundation to a multi-hour audition that involved a lot of dancing and sweating, and when I got back to my hotel room later in the day, my foundation looked the SAME as when I applied it that morning. That sealed the deal for me. For dry skin, the L’Oreal True Match Lumi will give you a luminous, flawless finish and SPF 20 protection! Two birds, one stone.
To buff my foundation onto my face, I love this Expert Face Brush by Real Techniques. It makes the job so quick and easy, and you can find it at Target, as well as most drugstores.
Concealer is a must for someone like me, because I never get enough sleep. The Maybelline Fit Me concealer is great because it can conceal dark circles and redness, and highlight your face as well! It’s such an all-in-one product.
To apply this concealer, I dot it on any spots I want to cover up, and then make a few dashed lines underneath my eyes. I use my ring finger to pat (don’t rub!) that into my skin back and forth under my eyes, always ending from outer to inner corner. This will prevent your concealer from creasing badly later on. Then I highlight down my nose, and sometimes the center of my forehead and my chin. That will give you a lighted-from-within glow in photos.
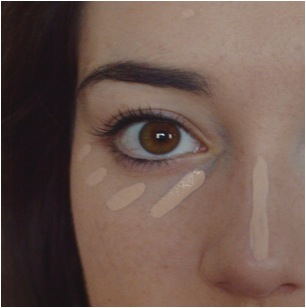 You always want to set your under eye concealer to prevent creasing, but if you have anything but really dry skin and you’ll be out in the Florida heat all day, you probably want to set your whole face. I really like the Neutrogena Healthy Skin powder for many reasons. For one, it’s pressed, not loose, so it travels really well. It also prevents breakouts and has an SPF of 30.
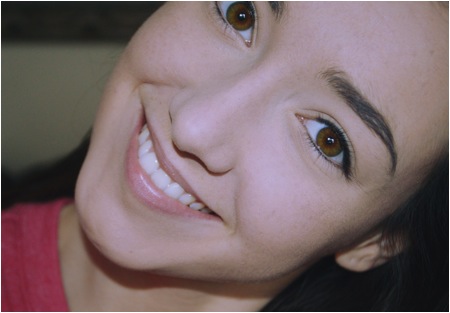 All set! Base is done! Now onto the fun stuff…
Bronzing your face is obviously TOTALLY optional, but I like to do it for a couple of reasons. Bronzing really warms up your face, and for someone whose skin tone is corpse (like me) it’s nice to look alive every once in a while. It makes you look glow-y and sunkissed. Also, it’s fun! Make this fun for yourself. It’s art on your face, people.
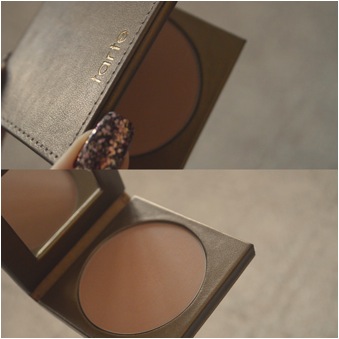
For me, I really love Tarte’s “Park Avenue Princess” bronzer. This is a higher-end product, but you can use any bronzer you like. This one is definitely for lighter-skinned people.
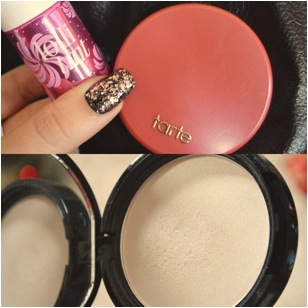
For blush, I am a HUGE fan of the Tarte Amazonian Clay 12-hour blushes. That was a mouthful, but man do they know their cheek products! Again, this is a pricier product, but so worth it. Their blushes are SO pigmented, so you just need the smallest amount, and therefore the product will last you forever and a day. They really do last all day! I used one in the shade “Charisma,” which is a warm peachy-rose shade with just a hint of golden shimmer. It makes you look like you’re glowing from within, and keeps with the sunkissed theme. Another option (pictured below, I didn’t use it) is the Lollitint by Benefit. I wore this every single day of my Disney trips this summer, and it did not MOVE from my face. It is a cooler-toned pink shade, and you need just the tiniest bit to get color payoff.
I added just a little bit of the NYX Illuminator in “Ritualistic” on the tops of my cheekbones to highlight. This gives a subtle sheen that lifts your face and makes you look glow-y and alive. Basically, the theme hear is GLOW. Glow with that show.
My next step is usually my eyebrows. My routine changes all the time, and this is obviously totally optional. If you do fill in your eyebrows at all, my one recommendation is to set them with some kind of brow gel, so they stay in place and “on fleek” all day long. I use the Benefit “Speed Brow” and it works like a charm.
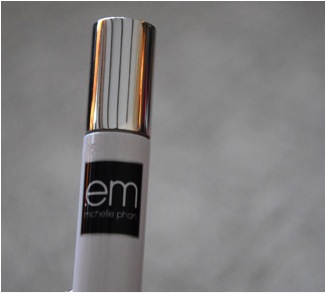
Moving onto the eyes! Always prime your eyelids before applying eyeshadow, so nothing creases and everything stays put. I love using the em by Michelle Phan eyeshadow primer. It is so easy to blend and my shadows will stay all day and night! You can find it on Amazon or on emcosmetics.com.
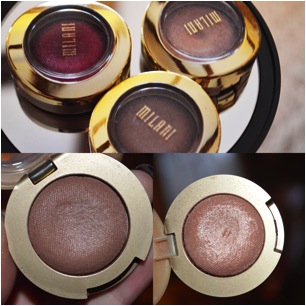
For eyeshadow, I wanted to do something that required no expensive palettes or anything like that. You literally need four eyeshadows for this look. That’s it. The first two are from Milani, which you can find at CVS or Walgreens. They are the Milani Bella Eyeshadows, and they are $4 each. I love them! They blend really nicely and the color range is great.
We are going to be using the bottom left shade first. It’s called “Bella Cappuccino” and it’s a great cool-toned brown color, perfect for deepening up the crease.
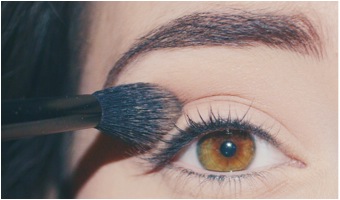
Using a fluffy brush like the one shown above, work this color into your crease using a curved motion. This will give the eyes dimension and make them really pop.
Next, take the bottom right shade, “Bella Champagne,” and use a flatter brush to pack this color onto the lid. This is a rose-gold color that catches the light beautifully and will warm up your eyes to balance out the cool-toned brown.
*Disclaimer: the third cranberry shade in the collage was one I used to smudge onto my lower lashline a little bit, which is totally optional. I just wanted a little color there. It’s a great way to use a fun color if you want to spice it up a little. Use whatever color you like!
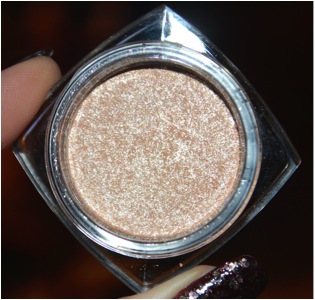
Next, we’re going to use this L’Oreal Infallible shadow in the shade “Iced Latté.”
This color is almost a perfect dupe for the infamous Stila “Kitten” eyeshadow. It’s a cream shadow, so it’s SUPER pigmented. Using your ring finger, dab and blend this onto the center of your eyelids. This will make your eyes look lifted, open and awake in pictures and in person. It’s a stunning color.
Last step for shadows is to just highlight the inner corners and brow bone with any white or off-white shadow. I believe I used one from Maybelline.
If you want to add eyeliner, go right ahead! I didn’t because I’m usually not big on eyeliner for day-to-day, but if you are, then you do you. I did, however, add mascara! I used the L’Oreal Voluminous “Miss Manga” because I find that it does a really good job of both lengthening AND volumnizing. If you like waterproof mascara, the Make Up For Ever Aqua mascara WILL NOT MOVE. I’m talkin’ Florida-hurricane-Kali-River-Rapids-Splash-Mountain triple whammy and you’re good. It’s insane.
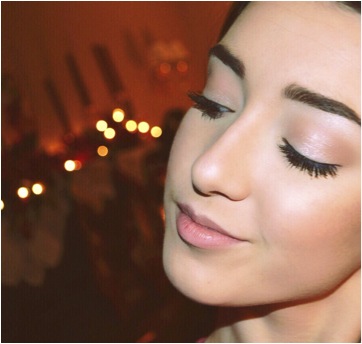
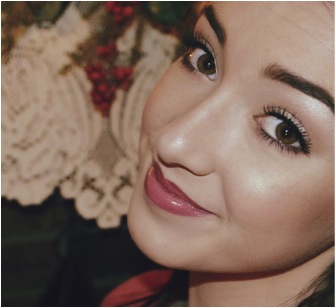
Here is the finished look with mascara!
Wait! We forgot something.
What could it be…?
Lips! I just randomly picked this combo and I LOVE it! For a day in the parks, you want something low-maintenance, flattering, and easy to apply. This combo is going to be flattering on so many people, and especially with this look.
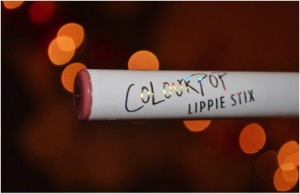
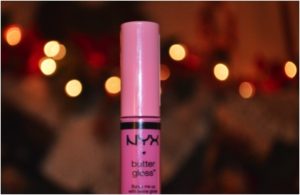
The first shade is by ColourPop. If you don’t know what ColourPop is, crawl out from under that rock and go check them out. They are a brand that does eye and lip products, and each product is $5. I’m not kidding. They are made in the USA, cruelty free, and the quality is ridiculously good. (No one is paying me to advertise, I am just such a huge fan of their products.) The shade I chose is called Lumière, which is a matte, dusty rose shade that is soooo beautiful. You could totally wear it on its own, but I decided to top it with a NYX Butter Gloss in Meringue. They aren’t kidding when they say “butter,” by the way; these glosses are the least sticky I have ever used.
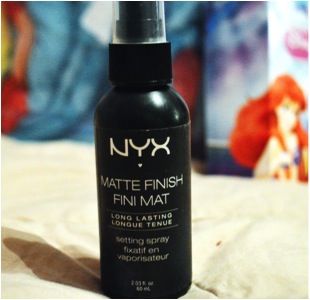
So now we’re all done! The last step is to set your makeup with a setting spray so everything stays in place in the heat and the sun and the fun!
There you have it! I hope you try this look out sometime! Even if you aren’t touring the parks, it’s a really wearable one that will look great on everybody!
I’ll be back soon! If you try this out, tag me on Instagram or Twitter (@disney_frump) so I can check it out! Thank you so much for reading!




Yes for setting spray! Whatever I put on my face I always use a little setting spray in the warmer months. Kristin did a fantastic job on this! I love it!
Great article!! Thanks for sharing! My makeup usually melts off when we are in Florida so I am definitely going to try this next time I go!
This is a wonderful article! I know that I’ve had my fair share of theme park makeup failures (looking back at a trip from this past June makes me cringe!), so I’ll be sure to check these all out ASAP, and hopefully use some of the tricks for my trip to Disneyland this August!
Great write up! Can’t wait to try a few new products. I follow Kristen on Instagram and always think her makeup is flawless.
Love this! My park make up seems to melt off all the time. Would you do one with higher end products also? It would be nice to get a good review before I spend the money!
great article! i just bought the rimmel london stay matte foundation & infallible iced latte eye shadow, & love both products!
thanks for the tips! 🙂